
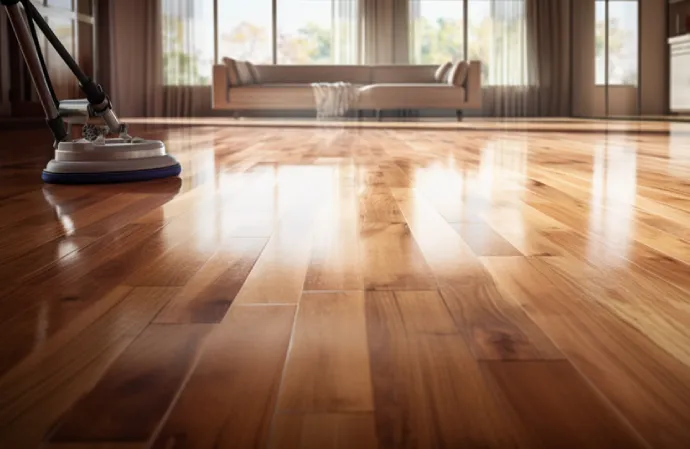
Sanding and polishing are essential to restoring a worn-out hardwood floor’s natural beauty or adding an elegant touch to another flooring material. Before you can sand and polish a floor, you must prepare it first.
Ensure you clear the floor by removing all furniture, rugs, and other objects that may obstruct the process. Next, thoroughly clean the floor by sweeping or vacuuming to remove any dirt or debris that could interfere with the sanding and polishing process.
If any crack fillers, sealants, or adhesives were applied to the floor in the past, scrape them off and ensure no residue is left.
Here, we’ll discuss the ideal way to prepare your floor for sanding and polishing. Using our expert tips and tricks, you can handle this task like a pro and then sand and polish.
How Do You Prepare a Floor for Sanding and Polishing: Only 3 Steps
Prepare your floor for sanding and polishing by following these three steps. The steps are:
- Step 01: Clear the floor area
- Step 02: Clean the floor
- Step 03: Repair damages
In order to prepare a floor for sanding and polishing, we need to look at each step in detail.
Step 01: Clear the Floor Area
Before starting the job as a professional floor sanding and polishing service, clear the floor area by removing furniture, rugs, and any other obstacles. It ensures that you have a clean and unobstructed surface to work on. Here are four key reasons why clearing the floor area is important:
- Safety: Removing furniture and other objects from the floor eliminates the risk of tripping or bumping into them while sanding and polishing.
- Efficiency: A clutter-free space allows for easier movement and access to all floor areas. It makes the sanding and polishing process more efficient.
- Even Results: Furniture or rugs left on the floor may create uneven pressure points during sanding, resulting in an inconsistent finish.
- Protection: Removing furniture prevents it from getting damaged or scratched during the sanding and polishing process.
Step 02: Clean the Floor
After you’ve cleared the floor area, it’s time to clean it thoroughly using a damp mop and mild detergent.
Start by sweeping or vacuuming the floor to remove any loose particles. Then, add mild detergent or floor cleaner to fill a container with relatively hot water. Put your mop in the solution, ensuring that it is barely damp.
Mop the whole floor surface, taking care to ensure thorough cleaning. Pay extra attention to high traffic areas or any spots with stains or spills. After you’ve finished mopping, allow the floor to dry completely before moving on to the next step.
Step 03: Repair Damages
- Thoroughly examine the floor’s surface for any signs of damage, such as holes, cracks, or uneven areas.
- Carefully scrape away any loose debris or damaged material using a putty knife or floor scraper. Be gentle to avoid causing further damage.
- Fill in any gaps or holes with an appropriate wood filler or putty. Apply it evenly and smooth out the surface with a putty knife.
- Allow the filler or putty to dry completely before sanding and polishing the floor.
How Do You Sand and Polish Your Floors After Preparing Them?
After prepping your floors, you’re ready to sand and polish them. Here is also a few steps to follow:
- Step 01: Choose the right sandpaper
- Step 02: Sanding
- Step 03: Clean up
- Step 04: Apply Finish
- Step 05: Final polishing
Let’s go deeper into each step.
Step 01: Choose the Right Sandpaper
Select the appropriate sandpaper to achieve the desired result for sanding and polishing.
Follow these steps to choose the right sandpaper:
- Determine the condition of your floor: Assess whether your floor has an existing finish or deep scratches that need to be removed. If so, begin with coarse-grit sandpaper (around 40-60 grit) to effectively eliminate these imperfections.
- Consider the type of wood: Different types of wood may require specific sandpapers to avoid damage or achieve optimal results. Research which sandpaper works best for your particular wood species.
- Test on a small area: Before proceeding with the entire floor, test the selected sandpaper on a small inconspicuous section first. This will allow you to evaluate its effectiveness and make any necessary adjustments before committing to the whole project.
- Gradually progress to finer grits: As you move forward, switch to finer grits such as 80-120 and 150-180. These will help smooth out any remaining roughness and create a more polished surface.
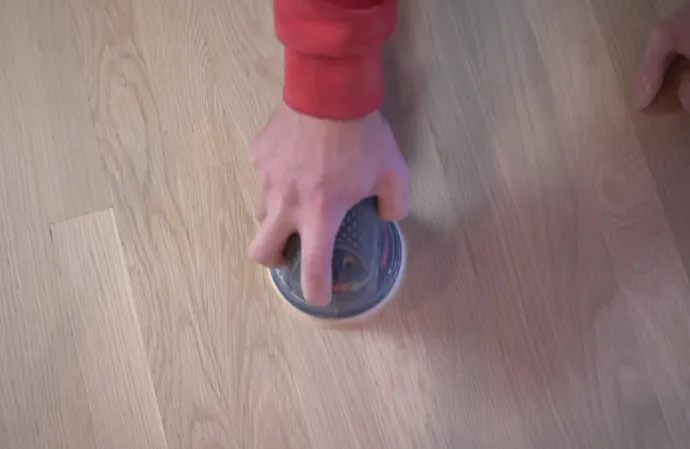
Step 02: Sanding
The first thing you should do is wear all the necessary safety equipment, such as a dust mask, safety goggles, and ear protection. Begin with the coarsest sandpaper and work your way up to finer grits. Remember to always sand in the direction of the wood grain and keep the sander moving smoothly and evenly.
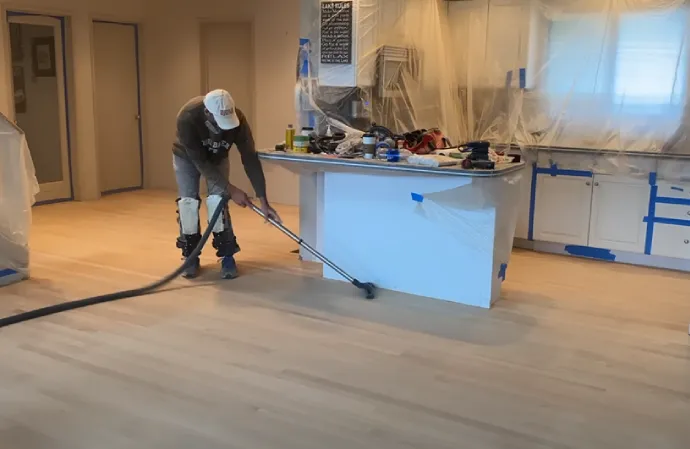
You can use dustless hardwood floor sanding to avoid the mess. It also helps to reduce the health hazards associated with dust particles.
While sanding, pay close attention to edges and corners where the sander may not reach. You may need to use a hand sander or sandpaper wrapped around a block for these areas. Keep in mind that maintaining a consistent pace will help avoid uneven sanding.
Step 03: Clean Up
After sanding, it’s important to vacuum or sweep the dustless hardwood floor again to remove any remaining dust. This step ensures a smooth and flawless finish when polishing your floor. Also, by vacuuming or sweeping, you maintain a clean floor and improve the air quality in your space.
Step 04: Apply Finish
Apply the chosen finishing product evenly using a brush, roller, or cloth, following the wood grain for a smooth and flawless finish.
- Pour a small amount of the finishing product into a clean container and dip your brush, roller, or cloth into it. Begin applying the finish at one corner of the floor and work toward the exit to avoid walking on the freshly applied finish.
- Make long, even strokes that follow the wood grain for optimal coverage. Take care not to apply too much pressure, which can cause streaks or uneven application.
- Allow the finish to dry according to the manufacturer’s recommended drying time before moving on to additional coats of sanding between coats if necessary.
Step 05: Final Polishing
Once the finish is dry, lightly buff the surface with fine-grit sandpaper or a steel wool pad to achieve a smooth and polished appearance.
Then add one final coat of finish for additional protection and shine. Before putting furniture on refinished hardwood floors, allow the last coat of hardwood floor to dry completely.
Revive Your Floors with Professional Sanding and Polishing Techniques
As you can see, preparing a floor for sanding and polishing requires patience, skill, and attention to detail. It’s essential to start by removing all objects from the floor and then thoroughly cleaning it of debris, dirt, and any residue left from previous treatments. Once the floor is prepped, you can start sanding and polishing.
Remember to use the right equipment, including sandpaper, sanding machines, and polishing tools, and follow the correct procedures to achieve optimal results. With the right approach, you can bring your floor back to life, transforming a dull and worn surface into a shining centerpiece that adds beauty, functionality, and value to your home.
0 comments